Saturday, August 30, 2014

A Faithful Friend

Here is a card created with one of our brand new stamps.  


And here is how to make it! Supplies are listed below.

Instructions:
  1. Cut Aegean cardstock 12"x6.5" and fold in half to create a 6"x6.5" cardbase. Cut peach coloured paper to 5.5"x6" and round the corners.
  2. Adapt digital cutting file so the opening is oval and measures 3" high. Cut from patterned paper. Cut a background piece without the leaf motif from Aegean cardstock.  Mount patterned paper on top so it only shows through the leaf motifs.
  3. Stamp Those Who Find a Faithful Friend using VersaMagic Jumbo Java centered on the previously cut peachy patterned paper.
  4. Create bow using Becca's Bow Maker. Attach to oval frame as shown.  Adhere house embellishment to frame as shown.
  5. Die cut Spellbinders Fancy Tag from patterned paper, cut in half and wrap around frame. Adhere in the front with a Pop Dot and in the back with a Glue Dot.  Attach a pearl embellishment as show.
  6. Adhere oval frame to stamped patterned paper with Pop Dots.

Supplies:
Cutting File: Quietfire Always
VersaMagic: Jumbo Java
Cardstock: Core'dinations Aegean


Being Thankful - for You


This set is perfect stamp set to mix and match - or use them all at once!  Since Thanksgiving is family and friends and home, I added a little house embellishment with the pumpkins!  Love this patterned paper by Bo Bunny.  I hope helps you create your own quick and easy cards.
Thanks for visiting! Suzanne


 Instructions:
  1. Cut natural cardstock to 10"x7" and fold in half to make a 7"x5" tent card.
  2. Cut a pumpkin patterned paper strip to 5.5" x 1.5" and mat with brown cardstock cut 1/8" larger around. Mount this strip on orange patterned paper measuring 6"x2" with Pop Dots.
  3. Cut 1.25" square from brown cardstock. Sponge house embellishment with frayed burlap and attach it to brown square using Micro Glue Dots.  Mount to center of patterned paper strip with Pop Dots.
  4. Lightly pencil a baseline 1.25" from the top fold and 1/2" from the side of the card. Stamp Quietfire Being Thankful along that line with the help of a stamp positioner using VersaMagic Pumpkin Spice.  Lightly pencil another line 1" from the bottom of the card and finishing approximately3/4" from the edge and stamp For You using VersaMagicTea Leaves as shown in the example.
  5. Adhere the patterned paper strip with house embellishment centered between the stamped lines.


Supplies:


Friday, August 1, 2014

Happy Birthday Card with a Bookbinding Embellishment

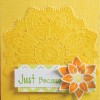
I hardly ever think of book corners for cards! Here I've featured the new Spellbinders Celebra'tions Doily Art Embossing folder and Quietfire Scalloped Book corners. I *needed*(!) to use the new Doily Art embossing folder!!


Instructions (supply list below)
  1. Form a 4 1/4" x 5 1/4" card base from #110 Solar White cardstock.
  2. Emboss the Doily Art using minty cardstock and trim so only the doily portion of the embossing remains. Score the embossed image in half and slit the spine for about 1/4" along the spine, right in the middle. Crimp Silver Scalloped book corners to the corners using pliers.
  3. Tie floppy bow with white wrinkled ribbon (approximately 2 yards) and thread the ends through the slot in the spine of the embossed image.  Secure the ends with tape.
  4. Stamp the smaller Quietfire Design Happy Birthday using Turquoise Gem on #80 Solar White cardstock.
  5. Die cut sentiment with the smallest label in Spellbinders Romantic Rectangles Two and sponge the edges with more Turquoise Gem ink.
  6. Adhere Pop Dots to the back of the embossing and mount on the white card base allowing the embossed image to extend about 1/4" from the spine of the white card base.
  7. Adhere stamped die cut onto embossed image using Mini Glue Dots.
 Thanks for having a look!
Happy creating, Suzanne


Here are thumbnail links to the supplies available on the Quietfire website.