Friday, February 28, 2014

Prime Publishing CHA Blogger Networking Event - Yes, There was Swag!

As things would have it, I was a few hours too late to register online for my usual list of seminars and roundtable discussions at the Craft and Hobby Association conference in Anaheim last month.  When I tried to register for them on the first morning of the conference, many had sold out.  I have to say that those I did get to attend were excellent, as always.  I'm not so much into taking workshops, there just never seems to be enough time for me to sit and do one thing for a number of hours.

I go to the CHA wearing many hats.  Sometimes I'm a retailer (that's what my show badge says!), sometimes I'm a manufacturer and sometimes I'm a designer.  I'm always overwhelmed.


There is a myth out there that when you attend CHA you are given tons of free samples.  In my experience that is a myth.  I always come home loaded with catalogs and inspiration, but not cool "stuff".  This year I had to eat those words.  At least for one event.


As there were so many things I couldn't get into, I thought I'd try the Blogger Networking event.  It was sponsored by Prime Publishing. You had to send in your information and a link to your blog.  *Sigh*  I was too late for that, too.  Then a few hours later I received an updated email saying a space had come available.  Oh, fun!  I had no idea what to expect.  I assumed a collection of manufacturers showing us what they did.  That sounded interesting and a bit more personal than the huge convention floor.

We stood in the lobby of the Hilton for a while as the line grew and grew.  Then the doors opened and we went into a reception room where there were drinks!  Perrier was my drink of choice.  I talked to a number of delightful people there.  Then we were let into the "big" room where we were introduced to our hosts at Prime Publishing. Some of you may already be familiar with them through favecrafts. (I'm still learning about everything they do.)

And yes, there were tables and people and appetizers and noise and excitement.  We spread out and worked our way around the room filling in our "dance" cards at the manufacturer's tables and learning what they did.  I learned a lot.  I met a lot of fascinating people.  I was so overwhelmed, I only took a few photos at the event.
  
Simone Collins of Prime Publishing


Can you tell I was smitten with the Sculpey Polymer Clay creations which Polyform had on display at their table?

It was the end of the event and they had us gather round to tell us about the Best Blogger Craft Contest and that on our way out we should pick up our swag bags.  Swag bags?  Really?  That's cool, didn't expect that.  Well, I went back to the hotel with 4 over-stuffed bags of the coolest stuff!   I was shell-shocked.

So we're all going home and making things with our swag and sharing those creations with our followers.  I have submitted a simple project to the Best Blogger Craft Contest. (Please note, you had to be part of the event to be eligible.)  I'm so pleased they extended the deadline as it's always chaotic returning home from CHA. Not only are you playing catch-up, but you're processing everything you saw and heard.

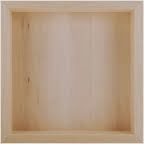
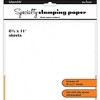
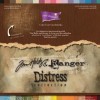
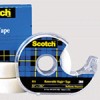
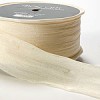
Here is a list of the manufacturers that were at the event and below you will see photos of the swag they shared with us all.  I look forward to creating over the next few months with these wonderful products! Watch for them.
Sizzix

My apologies for the quality of the photos!  They were taken that night in our hotel room - in hotel room light - before I had to put it all away.  My husband noted that we would be buying a new suitcase....  He was right!


Saturday, February 15, 2014

Queen of Hearts 2014 Winner

  Congratulations to 

You've won the prize on my blog!  Thanks for joining the hop!  Please email me suzanne@quietfiredesign.com with your snailmail address.
Happy stamping, Suzanne

Friday, February 14, 2014

Queen of Hearts Blog Hop - Thinking of You Centerpiece

Welcome to the 5th Annual Queen of Hearts Blog Hop. And Happy Valentine's Day!
Thanks for dropping in!  It's our very last day and we hope you've enjoyed your hopping.  Make sure you leave a comment on all the blogs to be eligible for a prize.  There is more information below.
Here is my contribution to the blog hop:


I've had this Walnut Hollow Basswood Canvas for some time.  It finally told me what it wanted to be!

The basswood canvases are just like regular deep canvases, except they're all wood.  When you flip them over, they are like a shadowbox, or - keep flipping - a container....
 
I think I've been hanging around in the "wrong" magazines lately and I was after a shabby chic look. This is what ultimately happened.


 Here are the supplies you will need for this project (thumbnail links for Quietfire products are below):
  • Walnut Hollow Basswood Canvas 6x6" Item 29619
  • Ranger Tim Holtz Distress Paints in Bundled Sage, Stormy Sky and Picket Fence.
  • Tim Holtz Foundations Box Corners
  • Sand paper
  • Quietfire Design Rubber stamps: The Longest Journey, I Wouldn't Have Missed Being Your Friend, To Create and Don't Let Yesterday
  • Distress Ink Pads in Stormy Sky and Bundled Sage
  • Glue Dots, Pop Dots and Double-sided Tape
  • Spellbinders Grand Calibur, Labels 22 and Foliage 2
  • Ranger Distress Cardstock in Bundled Sage and Stormy Sky
  • Ranger Specialty Stamping Paper


Instructions:
  1. Paint Basswood Canvas with Stormy Sky Distress Paint.  Allow to Dry. Using Bundled Sage paint the second layer and allow it to dry. Don't worry about perfect coverage.  We're going for the shabby look in this project. Use Picket Fence to paint the final top coat and allow to dry overnight.
  2. Use Picket Fence Distress Paint to intermittently cover the Foundation Box Corners. Allow to dry.
  3. Sand the painted surfaces with 120 grit sandpaper and wipe with a damp cloth.
  4. Use Stormy Sky Distress Ink to stamp the sentiments all the way around the base as shown in the accompanying photographs. (Bundled Sage is a bit too pale)  Normally I would go with an ink that shows more detail in the fine lines of the lettering, but I'm staying with the shabby look for this project, so Distress Ink is perfect.
  5. To create the sentiment label, use Stormy Sky Distress Ink to stamp "I Wouldn't Have Missed Being Your Friend" on Specialty Stamping Paper and when dry, die cut with Labels 20. Sponge around the edges with Stormy Sky and Bundled Sage Distress Ink. I wanted a border, but the next size label was much bigger. Too big. So I asked myself "What would Becca Feeken do?"  Well, I'm not sure she would have done this, but it comforted me somehow and allowed me to charge ahead....  Cut two Labels 20 from Stormy Sky Cardstock. Use Glue Dots to attach the one coloured label to the back of the sentiment label so there is a small border showing at the top. Use more Glue Dots to attach the second coloured diecut so there is a small border showing to the bottom of the sentiment label.  See photos below.
  6. Die cut two leaf flourishes, as shown, from Foliage 2.
  7. Use Pop Dots to adhere the sentiment label to the box and Glue Dots to adhere the leaf flourishes to the base and the label.
  8. Use Glue Dots or Double-Sided Tape to adhere the Foundation Box Corners to each corner of the Basswood Canvas to create a container.  There are small screw holes on the underside of the Box Corners should you wish to use them.
  9. Add floral container and flowers.


And there it is!
Make sure you leave a comment below to be eligible for a prize and you must visit Wanda's blog today, too!
There is still time to go back to all the blogs and leave comments before midnight tonight.

And make sure to link a piece of your "love-ly" artwork to our Queen of Heart blog post on Quietfire Creations at this link:  http://quietfirecreations.blogspot.ca/2014/02/welcome-to-queen-of-hearts-blog-hop-and.html before midnight tonight.
Thanks so much for visiting and playing along!


Here is our Blog Hop Schedule and the dates each designer will be posting (Click on each person's name to go to their blog):

Feb 10 - Holly and Teresa - setting the bar!
Feb 11- Sherry and Jutta
Feb 12 - Wendy and Terre
Feb 13 - Yogi and Robyn
 

Feb 14 - Suzanne (you are here) and Wanda
 
For a chance to win…. Leave a comment below before midnight PST February 14, 2014. A winner will be randomly chosen from my list of comments and your name will be posted on February 15, 2014. For more details AND to enter in the Queen of Hearts Challenge, please visit http://quietfirecreations.blogspot.ca/

Now leave a comment!  Good luck!


Here are the thumbnail links to the Quietfire products used in this project:

Saturday, February 1, 2014

Happy Birthday - Guy Style with DCWV


As I wandered around CHA, I knew I had to visit the Die Cuts With a View booth.  They always have a big walk-in booth that must take up a convention block!  But I wasn't distracted by a huge elephant this year.... too bad, it was amazing.  Instead, as primarily a cardmaker, I was drawn to their 6x6 Paper Stack pads of paper.  These weren't any papers, these were specialty papers.  Pads of gauze paper, burlap paper, cork paper, glitter paper.  These were really nice textural contrasts to the quick convenience papers I usually use.  It was quiet in the booth, so I was bold and asked if I could get a few samples.  They said they would send me some.  I expected a document size envelope with some bits and pieces inside.


What I got was this! It was like Christmas and I felt a bit embarrassed by their generosity. These are all 12x12.  I have already ordered some of the 6x6 pad for the site and they should be in within the next week.

You can see the DCWV catalog here.

 I had a guy birthday card to make, so I rummaged through all the papers - and they were wonderful. I considered the burlap or chalkboard, but ultimately went with the cork.  Combining the cork and burlap was part of the plan, but I didn't think they did anything for each other, so I went with the plain and printed cork sheets.

Here is the card again.


Instructions (see thumbnail product links at the bottom of the page)

  • Cut 6 5/8" x 4.75" rectangle of plain cork.
  • Cut 6 3/8" x 4 3/8" rectangle painted cork.
  • Use Spellbinders Labels 2 (or other plain Spellbinders Labels) to cut larger cork shape. 
  • Using VersaMagic Jumbo Java, stamp Quietfire sentiment.  Die cut sentiment with Spellbinders Labels die.  
  • Sponge Jumbo Java ink around the edges of each die cut and the painted cork rectangle.  
  • Cut a 4 inch piece of ribbon (I used Twill with Chevron Stripes, 3/4" in Champagne to compliment the chevron stripes in the paper), angle the ends and fold in half.  Staple to side of sentiment shape.  
  • Use Double-sided tape to adhere the bottom panel to the card and then use Pop Dots to add subsequent layers as shown in photograph.


I hope you enjoy reading about my little CHA adventure and the card.  It's really very simple!
A big THANKS to DCWV!
Happy Creating! Suzanne