Sunday, December 21, 2014

My Winter Wonderland Blog Hop Winner

Congratulations to
Sheila
Thank you for sharing the different techniques/materials used. 
 You've won one of our new mounted rubber stamps!
Please send me your snailmail address privately.  My contact info is in the sidebar where it says Contact Me!
Happy creating! 

Thanks to everyone who left wonderful comments and we'll see you back here for our Queen of Hearts Blog Hop next month!

Thursday, December 18, 2014

Quietfire Design Winter Wonderland Blog Hop - Day 4

Welcome to Day 4 of our Winter Wonderland Blog Hop. If this is your first stop, make sure you check back to the other blogs and leave comments to be eligible to win prizes.  Their links are at the bottom of this post.  The details for this blog hop are available on this blog post.

Now I have to start by apologizing!  I designed this stamp for the doodlers, the tanglers, the adventurers.  I'm not any of those!  But I decided to give it the old college try and here is what happened.... (This stamp is called JOY- Fill 'er Up and is similar to our Thanks - Fill 'er Up T stamp.)


The idea was to gild the inside of the letters.  Of course gilding is notoriously hard to photograph, so there is nothing like setting yourself up to fail!  Ultimately, I opted for painting in the gold and used Schminke Tro-Col Pale Gold gouache.

After stamping and thermal embossing, the first thing I did was spatter the gold onto the project.  Oh, well. Let's do it again! And again! And now it's a technique and essential element to the project.  And if you believe that I have a bridge to sell you.

The Tro-Col is easy to use, just mix it with a little water and spread it with a brush.  It flattens to a smooth surface and any indiscretions made by painting the embossed lines may be removed afterward with a brush dampened with fresh water. As for the spatters, well they helped disguise the other flaw - wayward embossing powder.  (Note to self: Wipe paper with dryer sheet before sprinkling embossing powder)


This project definitely needed some colour, so I popped in some red with a Tombow marker.


My first experiment with this project was using gold composition leaf.  It has potential, but I need to do some more work.  I'm used to using real gold leaf and can predict it better, but I know it's easier for crafters to get the composition leaf. It does behave differently.  Here are my results.  It looks better the more I drink.  Kidding, I'm virtually a teetotaler. (And yes, I had to look up the spelling of teetotaler.)


Another thing about this card was that I was originally thinking icy snow, and the card looked like this:


What do you like better?  I'm torn!

So that's about it for my project (the supplies are listed below).  I hope you enjoy this blog hop and I wish you all a very Merry Christmas and holiday season!

Just a reminder that all Quietfire rubber stamps are 25% off their regular price during the hop. 


Here is the blog hop schedule because we don't want you to miss an opportunity to win!  Go to each of the blogs and leave a nice comment on their Winter Wonderland Blog Hop posts. You have until midnight Friday, December 19th to comment.  Good luck!


Monday: Diana 
Tuesday: RobynYvonne  
Wednesday: WandaTeresa  
Thursday: Kathy Jo, Suzanne (you're here!)
Friday: SherryYogi


Here are the ingredients for making this card with thumbnail links to the Quietfire website:
Arches 140lb HP Watercolour paper
Schminke Tro-Col Pale Gold gouache
Coloured cardstock for card base
Foam adhesives for dimension


Thursday, November 20, 2014

Why are Lizards Patient?

The answer?  Because they have to be!!

Today is the deadline for mailing the byhandartists' 4x4 Quilties.  Well, I made the deadline.  A month late.


Do you ever get those cravings to make something really cool and when it comes to the crunch, something with higher priorities rears its head and there you are, listening to the sound of a deadline whooshing by?  That was what happened.  Add in a little creative constipation and there you have it.


So what does this have to do with Lizards?  The person I have sent my Quiltie to is my long time friend Lizardbeth (sometimes called Lizardbreath).  So the creative constipation was strengthened by the fact that Lizard is extremely creative and whatever she sets her mind to turns out beautifully.  The pressure was on.

But the great thing about Lizard is that she understands procrastination!  I think she would say she has it mastered.

It is with great relief that her less-than-traditional Quiltie left in the mail today!

I think my problem was that I had too many choices. I have plenty of fabric... ahem, too much, some might say.

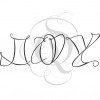
Ultimately the base I chose was cut from a piece of painted fabric from the stash I created at the late (and wonderful) Lisa Englebrecht's class taken years ago. I loved the bit on the edge, so I lettered "edgy" there.  I though Lizard would get a good eye roll out of that. The lettering was done with a 6mm Parallel Pen and acrylic ink (which was cleaned out immediately afterwards).

I must say when I learned of Lisa's passing last week, it was a strange feeling to think that I had chosen this fabric and was lettering on it at that time.  It's heartwarming to know she will live on and be remembered through her many dedicated students.

So realizing that my piece was pretty boring, I thought I'd outline the letters with stitching. Now this fabric is canvas and I was not enthusiastic about hand stitching it.  Does it surprise you to know that the last time I used my sewing machine, I didn't need to wear glasses?  What a nasty surprise!  And my poor sewing machine did not want to go.  I coddled it. It went.  But it needs a doctor.  I outlined the stitching with hot pink thread and then stitched a couple of flourishes in yellow, which substituted for gold.  I added some "cross stitches" with 
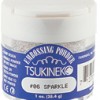
Jones Tones Plexi Glue and gold foil. The top-stitching around the edge was done with a bright blue.


I couldn't have done this without the help of the good people at Coats & Clark/Red Heart who filled my swag bag at CHA with this wonderful stash of thread in 18 vibrant colours. Perfect for this project!


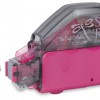
I also had the assistance of a fabulous pair of Fiskars' scissors, also acquired at the Prime Publishing Blogger Event at CHA.  They're called the Amplify Mixed Media Shears. These shears are designed to force the blades back together when you're cutting thick material.  I watched them cut through a big stack of denim at the demo (pretty impressive!), so they had no problem with my double layer of canvas and batting.  I'm really happy I have them.


So that's the long-winded story of my Quiltie.  I hope Lizard likes it.  She's certainly been patient enough!  Thanks Lizard!

Thanks for dropping by and reading!
Suzanne

Friday, October 31, 2014

Invisible Tears


As Breast Cancer Awareness month draws to a close, we must remember to keep those who it affects in our thoughts year round.  I originally made this stamp for my mother, who suffered mostly in silence from a chronic illness for many years and kept herself going through love of life and friends.  As with so many, her illness did not show much on the outside most of the time. When Robin Williams died, this quote was the first thing I thought of.


Invisible Tears is this week's Tuesday Winsday giveaway.


Here are the instructions to make this card.
  1. Cut white cardstock to 10" x 6" and fold in half to create card base measuring 6" x 5".  Cut white cardstock panel measuring 4 3/4" x 4" and a light pink panel measuring 1/8" larger all around.
  2. Stamp Invisible Tears sentiment in Memento Rose Bud onto white cardstock panel.
  3. Die cut a frame from white cardstock using Spellbinders Radiant Rectangles.  Using the diecut as a mask, position it over the quotation and sponge Memento Angel Pink through the cut out portions and around the outside.
  4. Mount white decorated panel on pink panel with Permanent Glue Dots.  Attach pink panel to card base with Pop Dots.
  5. Create a bow from hand-dyed ribbon and attach to the front using Permanent Glue Dots.


Thanks for stopping by and having a look!
Happy creating, Suzanne

Sunday, October 19, 2014

Published in Uppercase Magazine


I really didn't believe it until I had the issue in my hot little hands!  In an issue filled with beautiful pointed pen lettering, there is my little broad-edge contribution.

I'm referring to the current issue of  Uppercase magazine.  It is a very cool publication.  It is very well produced and a joy to hold in your hands. And this issue is filled with beautiful examples of calligraphy and lettering.

What is Uppercase?
It is a publication for the creative and curious that sparks the imagination and inspires creativity. 
Uppercase magazine is the brainchild of Janine Vangool who is its publisher, editor and designer and who basically wears all hats (doesn't that sound familiar!?).

Janine is very active on Instagram where you may see wonderful photos of what inspires her as well as sneak peaks of what's happening and what's coming at Uppercase! 


In the issues I have seen, there is always an interesting insert - a challenge throwout.  The photo above is my Instagram photo from the last issue challenge.  I lettered and cut "Upper case" in my current favourite colours. Since there is heraldry in this new issue, the challenge is to design your own crest and share it on Instagram and Twitter using the card provided.  Another inclusion is a blank card, designed for you to send to a friend/family member who you have just bought a gift subscription for!  
These are the best inserts EVER!

Here is a link to the official page of this issue so you can have a look! There are lots of other issue pages for you to browse while you're there.  But there is nothing like holding the magazine in your hot little hands. 

My submission is on this page:

Interested in subscribing? (I did, even before I was included!)  I can share this discount code with you!
The discount code “letterlove” will take $15 off subscriptions, valid until October 31. Here is a direct link to the subscription page starting with this issue.  Don't forget the discount code!!

Happy reading!

Wednesday, October 8, 2014

Not All Those Who Wander - Happy Birthday Antje!


Happy Birthday Antje!  I hope our wanderings bring us together again sooner rather than later!
Hugs, Suzanne

P.S. It's on its way! Sorry it didn't make it to you in time!

Saturday, October 4, 2014

Walnut Hollow & Quietfire Design Blog Hop - Enter to Win!

All the projects have been posted - and they are amazing!  


There is still time to enter to win our grand prize - and it's an awesome prize!!


To be eligible for our grand prize, your work is simple:  Please leave a comment on each of our blog posts, nine on the Quietfire Creations blog and five on the Walnut Hollow blog hop posts here: http://walnuthollowcrafts.wordpress.com/   So that will be 14 comments in total on two different blogs from September 29, 2014 to October 3, 2014!  The winner must be a resident of North America.  

You can go back and comment at any time on any of the blog posts to be eligible, but you should finish by midnight Sunday October 5th PST.

We will draw the prize on Monday October 6th, 2014 and the winner will be announced shortly after in a separate blog post. We look forward to seeing your comments!  Tell your friends!

List of Blog Hop Posts with links:
Wanda
Teresa
Chris
Sherry
Kathy Jo
Sara
Holly
Yogi
Chris
Judi
Yvonne
Robyn
Suzanne
Chris
Good Luck!
and Happy Thanksgiving to all the Canadians


Saturday, August 30, 2014

A Faithful Friend

Here is a card created with one of our brand new stamps.  


And here is how to make it! Supplies are listed below.

Instructions:
  1. Cut Aegean cardstock 12"x6.5" and fold in half to create a 6"x6.5" cardbase. Cut peach coloured paper to 5.5"x6" and round the corners.
  2. Adapt digital cutting file so the opening is oval and measures 3" high. Cut from patterned paper. Cut a background piece without the leaf motif from Aegean cardstock.  Mount patterned paper on top so it only shows through the leaf motifs.
  3. Stamp Those Who Find a Faithful Friend using VersaMagic Jumbo Java centered on the previously cut peachy patterned paper.
  4. Create bow using Becca's Bow Maker. Attach to oval frame as shown.  Adhere house embellishment to frame as shown.
  5. Die cut Spellbinders Fancy Tag from patterned paper, cut in half and wrap around frame. Adhere in the front with a Pop Dot and in the back with a Glue Dot.  Attach a pearl embellishment as show.
  6. Adhere oval frame to stamped patterned paper with Pop Dots.

Supplies:
Cutting File: Quietfire Always
VersaMagic: Jumbo Java
Cardstock: Core'dinations Aegean


Being Thankful - for You


This set is perfect stamp set to mix and match - or use them all at once!  Since Thanksgiving is family and friends and home, I added a little house embellishment with the pumpkins!  Love this patterned paper by Bo Bunny.  I hope helps you create your own quick and easy cards.
Thanks for visiting! Suzanne


 Instructions:
  1. Cut natural cardstock to 10"x7" and fold in half to make a 7"x5" tent card.
  2. Cut a pumpkin patterned paper strip to 5.5" x 1.5" and mat with brown cardstock cut 1/8" larger around. Mount this strip on orange patterned paper measuring 6"x2" with Pop Dots.
  3. Cut 1.25" square from brown cardstock. Sponge house embellishment with frayed burlap and attach it to brown square using Micro Glue Dots.  Mount to center of patterned paper strip with Pop Dots.
  4. Lightly pencil a baseline 1.25" from the top fold and 1/2" from the side of the card. Stamp Quietfire Being Thankful along that line with the help of a stamp positioner using VersaMagic Pumpkin Spice.  Lightly pencil another line 1" from the bottom of the card and finishing approximately3/4" from the edge and stamp For You using VersaMagicTea Leaves as shown in the example.
  5. Adhere the patterned paper strip with house embellishment centered between the stamped lines.


Supplies: