

 As I wandered around CHA, I knew I had to visit the Die Cuts With a View booth. They always have a big walk-in booth that must take up a convention block! But I wasn't distracted by a huge elephant this year.... too bad, it was amazing. Instead, as primarily a cardmaker, I was drawn to their 6x6 Paper Stack pads of paper. These weren't any papers, these were specialty papers. Pads of gauze paper, burlap paper, cork paper, glitter paper. These were really nice textural contrasts to the quick convenience papers I usually use. It was quiet in the booth, so I was bold and asked if I could get a few samples. They said they would send me some. I expected a document size envelope with some bits and pieces inside.
What I got was this! It was like Christmas and I felt a bit embarrassed by their generosity. These are all 12x12. I have already ordered some of the 6x6 pad for the site and they should be in within the next week.
You can see the DCWV catalog here.
I had a guy birthday card to make, so I rummaged through all the papers - and they were wonderful. I considered the burlap or chalkboard, but ultimately went with the cork. Combining the cork and burlap was part of the plan, but I didn't think they did anything for each other, so I went with the plain and printed cork sheets.
Here is the card again.

 Instructions (see thumbnail product links at the bottom of the page)
- Cut 6 5/8" x 4.75" rectangle of plain cork.
- Cut 6 3/8" x 4 3/8" rectangle painted cork.
- Use Spellbinders Labels 2 (or other plain Spellbinders Labels) to cut larger cork shape.
- Using VersaMagic Jumbo Java, stamp Quietfire sentiment. Die cut sentiment with Spellbinders Labels die.
- Sponge Jumbo Java ink around the edges of each die cut and the painted cork rectangle.
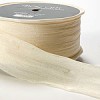
- Cut a 4 inch piece of ribbon (I used Twill with Chevron Stripes, 3/4" in Champagne to compliment the chevron stripes in the paper), angle the ends and fold in half. Staple to side of sentiment shape.
- Use Double-sided tape to adhere the bottom panel to the card and then use Pop Dots to add subsequent layers as shown in photograph.
I hope you enjoy reading about my little CHA adventure and the card. It's really very simple!
A big THANKS to DCWV!
Happy Creating! Suzanne
Simple but effective. Nice manly look, Suzanne.
ReplyDeleteMstgane
Ann
Great 'guy' card
ReplyDeleteWow - Christmas indeed! Love the cork and the card - very nice. I see some of this coming my way in the near future! Thanks for sharing, Suzanne!
ReplyDeleteGreat guy card.
ReplyDeleteLove the look of that cork, and the card is classy!
ReplyDeleteFantastic!!!!!
ReplyDelete