Showing posts with label Imagine Crafts. Show all posts

Sunday, February 22, 2015

Clean and Simple Kraft Wedding Set

Kraft and white. Yummy! 
Here is a clean and simple look for a wedding! Combine the kraft look with white and a few classy embellishments and that's all you need.


Supplies
Stamp: Quietfire Design The Origin of Love
Ink: Tsukineko/Imagine Crafts VersaMagic Midnight Black
Quietfire Heart Wedding set

Cutting File: Quietfire Design SVG file Heart Wedding Invitation, Placecard & Favor Box
Cardstock: Little Bee Kraft and White Multi-Pack, Staples 110# White cardstock
Punch: Little B Honeycomb
Sticker Embellishments: Little B Wedding Cake
Glue Dots
Tombow Stamp Runner
Stamp positioner 
Be Creative Double-sided tape


Instructions
  1. Open the cutting file and separate all the elements.  Cut the card from the Kraft and White duplex (double-sided) cardstock. Cut the place card and favour box from plain kraft cardstock and the small hearts from white.
  2. Accordion fold the card. Continuously punch a 3-1/2" strip of white cardstock and adhere it to the front of the card as shown.
  3. Stamp the sentiment on the second panel of the accordion so it appears through the heart cut in the front panel.
  4. Adhere the Wedding Cake sticker to the heart that drops out when the front panel is cut and add to the third panel.  Hand write the invitation information where desired.
  5.  Continuously punch a 4-1/4" strip of white cardstock and cut in half lengthwise.  Adhere to the bottom edge of the place card as shown. Trim if necessary.  Add wedding cake and little flower embellishments.
  6. Assemble the favour box by folding all the score lines upwards, except the diagonal lines in the box top which must be folded the other way. Make sure the diagonals are well creased. Adhere the tab to the opposite side to create the box and fold up the bottom. Continuously punch a strip of white cardstock to about 6-1/2" and adhere around the outside of the assembled box. Trim if necessary.  Close the top by holding two opposite diagonal folds and push to the center. Adhere the loose hearts to the box top and add flower embellishments from the Wedding Cake set.
Place Card embellishment detail
Favour Box detail


Thanks for stopping by!
Suzanne
Monday, December 23, 2013

Imagine Crafts/Tsukineko Ornament Exchange Received!

So told you about the Imagine Crafts/Tsukineko ornament that I created (see it here) whose recipient is different than the person you receive from.  Well this is the very cool one I received. 

 
The only thing that was inside with it was John Creighton Peterson's business card, so I guess he had a hand in making it!  Thanks so much John.  See you at CHA!It arrived flat and then fanned out.
So pretty!

Thursday, December 12, 2013

Imagine Crafts/Tsukineko Ornament Swap

When Imagine Crafts organized an ornament exchange, I though I can do this!  And then I didn't know where to start.  With many starts and stops here is what ultimately came about.


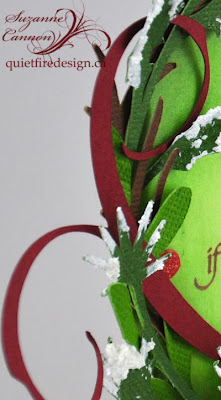
I used my Silhouette designs for both the ball and the wreath elements, but you may have Spellbinders dies that would do the same thing!  I laid the wreath bits out this way:


I used five colours of cardstock and cut:
light green: 6 x 4.5" (broad leaves)
dark green:  6 x 6"  (1 pine sprig and 2 holly)
brown:  6 x 5"  (3 twigs)
white: 6 x 3.5"  (3 berries)
red:  6 x 4"  (flourish)

Lay the cardstock on the cutting mat in position for cutting the elements as shown above.  As it turns out, I didn't use all the elements, but how you design yours may be completely different!
I cut the plain ball ornament, first resizing it to 5.43" tall and 4.24" wide.

Love is What's In the Room was stamped on the ball using VersaFine Crimson. Brilliance Pearlescent Thyme and Versamagic Hint of Pesto were blended around the edges of the ball. If you want a more vintage look, try Memento Pistachio and Toffee.


I applied Snow-Tex on the edges of the holly and pine leaves with a Spatula and spritzed the other elements with Goosebumps Texture Spray.


The wreath elements were bent and arranged around the edges of the ball and adhered with glue dots which I can reposition if I really don't like their placement!
I used a regular round paper punch to make red cardstock berries to add a little colour.

 
Because I thought the back was rather boring, I attached the flourished ball and thought it was fun to see that if the ornament was backlit, the flourish showed through! Cool! That was an unexpected bonus.
 

The final touch was choosing just the right ribbon as a hanger!  Both are from May Arts.

Here is the Vintage colours version.


I sure hope the person who received this likes it! 
Thanks for having a look!  Suzanne

Here are the thumbnail links to the products used in this project.  If the link doesn't work, it may mean the product is sold out or has moved on the site, so try searching right on the site!