

Wednesday, December 24, 2008
Sunday, November 30, 2008
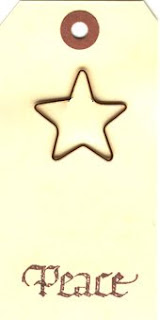
More Christmas Tags!
Here are a few more Christmas tags I've made in the last few days!
This first tag uses the new Gentle Thoughts Christmas stamps and the copper star clip. To make the trees, I hammered 36 gauge copper with the Tim Holtz Texture Hammer and cut the copper with scissors. Each tree has a different texture!


This last tag uses one of the houses from the Village brass stencil and embossing paste!
Please note: the sale noted in the previous post has been continued till December 3, 2008!!
Thursday, November 27, 2008
Quietfire Design's Perfect Gifts for Artists Sale
byhand Product Update
SALE!!!
Perfect gifts for the Artists in your life!
See details on the Product Update Page
Orders over $85 receive
a free sketchbook!!
(while quantities last)
Sunday, November 23, 2008
A few Christmas Tags

When I saw the very cool tags that Kelly had uploaded to the Quietfire Designers Blog, I though it would be fun to do a few tags. Wow, it's like eating chips, you can't stop at one! Here is a selection that I created in just a few minutes using the new Quietfire Christmas Rubber!
I used the
Dew Drops Stamp Pads in greens and reds
and the tags!
Happy creating! Suzanne
Friday, November 14, 2008

Christmas Cards with the new Quietfire Rubber
Ahem! That'll be cards, not rubber cards....
and if you've checked the QF Design Team Blog.... yes! this is the same card!

And Kelly thought I was thinking of her when I made this card!!!
Here is a closeup of the heart brads:

To make this card, I used:
Bazzill Monochrom Cardstock
Heart Brads
Naughty Nice, check one
Thinking of You (smaller)
VersaMagic Dewdrop Spanish Olive
VersaMagic Dewdrop Tea Leaves
and if you've checked the QF Design Team Blog.... yes! this is the same card!
And Kelly thought I was thinking of her when I made this card!!!
Here is a closeup of the heart brads:
To make this card, I used:
Bazzill Monochrom Cardstock
Heart Brads
Naughty Nice, check one
Thinking of You (smaller)
VersaMagic Dewdrop Spanish Olive
VersaMagic Dewdrop Tea Leaves
Tuesday, August 12, 2008
Tuesday Created byhand Challenge - Journey, Travels
 Here is my contribution to the Tuesday byhand Challenge this week. Products used:
Large Tag
Collage Image from Suzanne's Favourites (also available in Digital format)
Paper flower
Wheresoever you go
Embossed paper
Crimson Copper Brilliance DewDrop inkpad
Heart Brad
Monday, August 4, 2008
Tuesday Created byhand Challenge - Pinned Back Card
 Here is my contribution for the Tuesday Created byhand Challenge!
The instructions for the card, designed by QFD Team Member Kristy Christopherson, can be found on the Quietfire Design website here. It's a very quick card to make. My girlfriend says she's going to use this design for her Christmas Cards!
I used the Black Cardstock
The little girl from Vintage Children 2
Cherish stamp from Mini Images Compilation
Copper Brads
Thursday, July 17, 2008
Tuesday Created byhand Challenge - Envelopes
 Here is my contribution! Click here to see how it was made!
 Thursday, July 10, 2008
Wedding Guest book

Just thought I'd share a guest book I made for a wedding shower last weekend. Their colours are black and white!

The decoration in the window is the self-adhesive pewter heart.
Friday, June 13, 2008
Created byhand Tuesday Challenge
 Crow Border
This week's challenge was using VersaMark stamp pad. Here is my contribution. You can read how to do this Murder of Crows in the Quietfire Design Project Gallery
Tuesday, June 10, 2008
Gilding!
Well, I just had to. I couldn't resist going to a workshop where everyone was splashing around gold leaf! It's been years since I've had gold fingers.
The Fairbank Calligraphy Society had a weekend workshop on gilding taught by Georgia Angelopoulos. What a blast! Everyone did something very cool - you didn't need to be a calligrapher to make something that you would have been proud of! Georgia did a wonderful job of showing what could be done and how to get there. She's done lots of research and experimenting. If you get a chance to take a course with her, run, don't walk to register!
The letterforms for this class were borrowed from a manuscript - the Stockholm Codex Aureus. I thought the letters in the manuscript were nasty - I wouldn't have been happy if I'd done them! Maybe my aesthetic intelligence needs enlightening.....

What did I do in class? As usual, I bit off more than I could chew! With the Teller quotation from the last blog entry fresh in my mind, it became a pretty interesing choice with words that were easily chosen to highlight in gold. This piece is far from finished (guess you figured that if you've read the Teller quote) and the rest of the quote will be added in a cursive hand. I figure I'll be able to ruin this piece in about half a second. I tortured myself trying to decide if I should add the cursive lettering at the workshop where I would get all kinds of encouraging sympathy from my fellow calligraphers or ruin it in the privacy of my own home.... I guess I chose the latter!
The other piece I worked on was on black - metals just !pop! on black. It was an experiment and it worked quite successfully. To get the effect of the metal fading towards the light, I sprayed the leaf still adhered to the transfer paper prior to applying it to the black paper. I borrowed the words from the Teller quote
The Fairbank Calligraphy Society had a weekend workshop on gilding taught by Georgia Angelopoulos. What a blast! Everyone did something very cool - you didn't need to be a calligrapher to make something that you would have been proud of! Georgia did a wonderful job of showing what could be done and how to get there. She's done lots of research and experimenting. If you get a chance to take a course with her, run, don't walk to register!
The letterforms for this class were borrowed from a manuscript - the Stockholm Codex Aureus. I thought the letters in the manuscript were nasty - I wouldn't have been happy if I'd done them! Maybe my aesthetic intelligence needs enlightening.....
What did I do in class? As usual, I bit off more than I could chew! With the Teller quotation from the last blog entry fresh in my mind, it became a pretty interesing choice with words that were easily chosen to highlight in gold. This piece is far from finished (guess you figured that if you've read the Teller quote) and the rest of the quote will be added in a cursive hand. I figure I'll be able to ruin this piece in about half a second. I tortured myself trying to decide if I should add the cursive lettering at the workshop where I would get all kinds of encouraging sympathy from my fellow calligraphers or ruin it in the privacy of my own home.... I guess I chose the latter!
The other piece I worked on was on black - metals just !pop! on black. It was an experiment and it worked quite successfully. To get the effect of the metal fading towards the light, I sprayed the leaf still adhered to the transfer paper prior to applying it to the black paper. I borrowed the words from the Teller quote

Materials used for this piece
Drawn letters on
Arches Black Cover
Gold Size
24.5 Carat Gold Transfer Leaf
Spray adhesive
Do you want to see how the other metals (copper and silver) looked in the hands of a pro? Click here!!
Happy creating! Suzanne
Monday, June 2, 2008
Created byhand Challenge - Wings

Sorry, this is another re-tread! I'm working on new rubber (oh, how clever... retread, more rubber - didja get it? huh?) - that's my excuse and I'm sticking to it!
I just love this quotation and would really love to do it as rubber, but I need to check out the attribute more thoroughly and potential copyright issues.... Email me if you have any insight!
For this atc I used:
Happy creating! Suzanne
Friday, May 16, 2008
Quicky Playtime Artwork
I needed something for the byhand Newsletter pronto, as I really wanted to publish it before we went away for the weekend! So it's not my most exquisite lettering..... sorry! You can see the newsletter here.

I wanted to demostrate the 2-line Automatic pens and how you could letter with acrylic ink and then paint over it. I didn't get the drama in the watercolour wash I was hoping for, darn it! (but I was after delicate colour - can you have delicate and drama - oh, ya, but not today.... smile!)
I mixed up little watercolour puddles in my palette (I love the Robert E Woods palette and use it exclusively for painting). When I began painting, I took a workshop, but then I learned *a lot* from pouring over Jeanne Dobie's Making Watercolour Sing. I used a wide Gesso Brush and slopped, yes, pretty much slopped, the water onto the watercolour paper (which I didn't have to worry about stretching and buckling because it's a block). I wanted a delicate colour mixing, so I had to water down that strong FUB quite a bit.
I wanted to demostrate the 2-line Automatic pens and how you could letter with acrylic ink and then paint over it. I didn't get the drama in the watercolour wash I was hoping for, darn it! (but I was after delicate colour - can you have delicate and drama - oh, ya, but not today.... smile!)
For this project I used
- #9 2-line Automatic Pen
- Magic Color Cobalt Blue
- Arches HP Watercolour block
- Pigma Pen Black 08
- Gesso Brush
- French Ultramarine Blue (FUB)
- Rose Madder Genuine
I really enjoy a 2-line pen - the Automatic pens come in several sizes of 2-line. I also carry the Scroll marker here. It sure makes you pay attention to your pen angle!
I lettered Home with the Automatic pen using the Cobalt Blue Magic Color ink and allowed it to dry. Acrylic ink dried waterproof which is fun because you can do a watercolour wash over top and the lettering won't budge. (I don't like acrylic ink for small formal lettering though, I've never been able to get good hairlines with it)
I used the Pigma Pen to letter the rest of the quote. The Pigma ink is also waterproof when dry.
I mixed up little watercolour puddles in my palette (I love the Robert E Woods palette and use it exclusively for painting). When I began painting, I took a workshop, but then I learned *a lot* from pouring over Jeanne Dobie's Making Watercolour Sing. I used a wide Gesso Brush and slopped, yes, pretty much slopped, the water onto the watercolour paper (which I didn't have to worry about stretching and buckling because it's a block). I wanted a delicate colour mixing, so I had to water down that strong FUB quite a bit.
Tip the watercolour block to allow the paints to mix before they dry. Magic!
Monday, May 12, 2008
Created byhand Tuesday Challenge - Fabric

Okay, so I'm cheating by using something old, but hey, I just dreamed up this challenge yesterday!
I had such a good time making this ATC. I think it just needs to be finished off around the edge with a blanket stitch..... One of these days.....
 You can see this as a project on my website.
 Happy creating! Suzanne
Monday, May 5, 2008
Created byhand Challenge - Charms

Here is my submission! I was suppose to go to my first ATC swap yesterday, but didn't quite make it (for a really wonderful reason, though!). The theme was marine things, so I made this atc and thought the charm was a teasing poke at fishermen who "embellish" the sizes of their catches! (There are a lot of fishing types in this part of the world!)
This atc is done on Tyvek using Magic Colour Acrylic ink to colour the background. The fishy stamp is Fred Mullett, the flourish is Quietfire Design Flourishes. The One Inch charm can be found here and the brads are here!
Wednesday, April 2, 2008
The Brag Flag Book
 Here is a Special Project for you!
I was delighted to be asked by Tim Hammonds of Scor-it and designer Judi Kauffman to create the first piece for a series of Scor-it articles on Scrapbooking.com, the online scrapbooking magazine.
Here is a direct link to the article with instructions, in their Paper Crafting section, and you can see the slide show below.
Supplies you will need:
- Scor-it Board Original (On sale this month at 20% off! You won't see the reduced price till it's in your shopping cart)
- Bazzill Basics Monochrome Cardstock in Greens
- Bone Folder
- Life Journey Words Rubber Stamps
- Flourishes Rubber Stamps
- Italic Caps, Double Stroke Alphabet Rubber Stamps
- Italic Alphabet Rubber Stamps
- The Moment a Child is Born Rubber Stamp
- VersaMagic Dew Drop Tea Leaves
- VersaMark Stamp Pad
- Decorative paper, Edera Italian
- Double-sided tape or glue stick
- Temporary adhesive such as a Post-it Glue Stick
- Awl and Brads
- Ribbon


Monday, March 31, 2008
byhand Newsletter 7th Anniversary Contest

The Featured Quietfire Product for this project is Distress Embossing Powder!
This is one segment of a scavenger hunt for a $30 gift
certificate from Quietfire Design, celebrating the 7th Anniversary of the
byhand Newsletter compiled and designed by me.
certificate from Quietfire Design, celebrating the 7th Anniversary of the
byhand Newsletter compiled and designed by me.
Read the details of this hunt here!
Good luck!
I also used Flourishes, one of the Mini Images, Walnut Ink and a collage image from Suzanne's Favourites.
Sunday, March 30, 2008
Walnut Ink Background Variation
 This is my contribution to the byhandartists Background Swap! I've just discovered the special effect of Distress Embossing Powder! Combine it with Walnut ink and what is there to lose? Add some of the incredibly brilliant Tro-Col copper and you get the glitz with the texture. Wow!
Here's what you need:
- Spritzer Bottle
- Walnut Ink
- Brush
- 140 lb Arches Cold Watercolour paper
- Distress Embossing Powder
- Tea Dye
- Fired Brick
- Schminke Tro-Col- Gouache - Copper
- Little Bitty Scoop
- Heat Gun
Instructions:
- Mix up the strongest batch of Walnut ink you possibly can. Make
sure all the crystals are dissolved. - Spritz a piece of watercolour paper with water.
- Begin brushing the Walnut Ink over the paper.
- Before the Walnut ink dries, begin randomly sprinkling Distress
Embossing Powder on the surface. - Sprinkle Tro-Col Copper onto the surface. If the surface has begun
to dry, spritz it again as you don't want everything to blow off
when you begin heat setting. - Heat set a small area at a time, working your way over the entire
surface of the paper. - You will have wonderful texture! Don't worry if some of the Distress
Embossing Powder flakes off. It's meant to do that! - Have fun!!!
7th Anniversary of the byhand Newsletter

Well, I've been putting out the byhand Newsletter for 7 years. Way back then, I really wondered if I'd be able to scrape together enough to say to keep it going. But with lots of help from many very talented artists who've submitted their wonder creations, here we are today! How time flies.
It takes me about 3 days of work to put together a newsletter and I love doing it. Only rarely do I feel like I've gone through labour and delivery and those are usually newsletter that require a huge amount of photo-editing.
The next newsletter is almost ready to go.
!!!Check it out - we're having an Anniversary Party!!!!!
I'm giving away $100 worth of gift certificates in 3 separate "contests". Stay tuned for contest details in the newsletter!
To subscribe to the byhand Newsletter, visit the News Department in the right hand column of the Quietfire Design.ca homepage!
To see back-issues of the newsletter, click here!
Good luck! Suzanne
Sunday, March 2, 2008
The House Book
 I've been planning to do the Home Sweet Home Journal for over a year and it's finally to my satisfaction so I can write it up as a workshop! Yay!
 I just love these architectural miniatures! They are just so classy. That was probably the biggest hold up, but I have them now! I was so excited when they arrived.
I had a hard time deciding which door to use. The book isn't large

enough to use a door and a window on the cover, so the window went on the back cover. You can see more photos of the journal in the February byhand Newsletter.
The front cover is done on Arches Text wove starting with a very concentrated solution of Walnut ink. The surface was blotted and spritzed and Schmincke Gold Tro-Col as sprinkled in as well as Distress Embossing powder. It was gorgeous!
When the paper was dry, I began lettering with water, sucking out the Walnut ink and dabbing in Perfect Pearls in whatever colour took my fancy - I think they were mostly from the Patina kit. It was so much fun! Except for some of the lettering parts. Lettering over the spots that had Distress Embossing Powder on them was really tough!
I was pretty pleased with how it turned out.
Sunday, February 24, 2008
Created byhand Tuesday Glossy Paper Challenge

This is a birthday card for my son.
It's made with Alcohol Inks on Glossy white cardstock. The lettering was done with the Sailor Glue pen (Roann Mathias had me bring them in for her class at the calligraphy conference - I have no idea what she does with it, but my fingers have been itching to try it for months!). The glue was allowed to dry then I rubbed transfer foil on top. Yay! it stuck!
I did many layers from the Bazzill Greens Monochroms pack. What a great way to package paper! I love it!
Thanks for dropping by!
Friday, February 15, 2008
Winner of the One World - One Heart Event!

And the winner is....
TADA
Bethel of Bethania!
Thanks so much to everyone who dropped by!
Friday, February 1, 2008
Quietfire Black & White Challenge WinterStamp '08 at Two Peas
Take the Quietfire Black & White Challenge at Two Peas in a Bucket from February 2 to 9th, 2008.
Create a black and white card (a hint of another color is ok) using a sentiment from the Quietfire Design site.
 If you don't own a Quietfire stamp, you may use a computer-generated version you create yourself, or handwriting, etc. Include some stamping on your card.
More information on adding your artwork to the 2 Peas Galleries is here. Scroll down to POST IN THE GALLERY and read the instructions
RAK: one calligraphy sentiment stamp from the site, up to a value of $8.00. If you can use an actual QFD stamp on your card, you can then select TWO stamps, up to a combined value of $16.00. Suzanne will pay shipping to you, and your winnings will be sent to you directly from Quietfire Design.
Check it out! There are lots of opportunities to win. Create without Limits!
My little contribution uses the
Bare Trees Stencil and Black Embossing paste on Glossy Cardstock which i have hand written a quotation using a Micron Pigma Pen (03 black).One World - One Heart Event


Here is my blog give-away for One World One Heart!
Read more about the event at the host blog!
If you leave a comment with your world location (city/country), you will have a chance to win a digital Collage Sheet from Quietfire Design (that's me!) as shown above. (If you can't receive large email files, I can mail the collage sheet to you)
One name will be drawn on February 14 to win this collage sheet! Thanks for participating and good luck!
Make sure you come back to see if you're the winner. Have fun! Suzanne
Created byhand Tuesday Black & White Challenge

Here is my contribution to the Black & White Challenge! I drew an oval from a template and stamped a smaller Flourish around the drawn line using Brilliance Graphite Black on white cardstock. Then stamped A Word Lovingly Written.
Kind of interesting...... Happy creating, Suzanne
Thursday, January 24, 2008
Created byhand Tuesday Inchie Challenge

I did a double-sided inchie for this challenge.
And the other side?
 These were stamped with VersaFine Black and VersaMagic Dew Drops Pixie Dust using one of the the Quietfire Design Tiles onto K&Company La Boutique Designer Paper. Waxed linen thread was used to secure the Yes and No charms.
Monday, January 21, 2008
Created byhand Tuesday Distress Inks Challenge - Balancing Act

As usual, this wasn't what I expected to do! I used Aged Mahogany (fabulous colour!) Distress Ink for the Flourish and to colour the paper the Inchie is mounted on.
Create without Limits!
Tuesday, January 15, 2008
My Very First.... Inchie
 It's always nice to find that you have a 1" square stamp! I felt the need to resurrect an idea I had a few years ago for a flying heart! I used little loops of ribbon for the wings. Give it a wee kiss and let it fly!
For this Inchie I used:
Bazzill Card Stock
Tile Rubber Stamp
Puffy heart
thin green satin ribbon
Mini Glue Dots
Distress Frayed Burlap
And what happens to Inchies after they're finished?
Here's one use!

Friday, January 11, 2008
Sweet Cheeks
 Oh my, it depends on your computer monitor if this looks like a black background! It's really dark blue. The big disappointment is the large Flourish. It is stamped with The Essential Glue Pad and then Silver Composition Leaf was adhered to it. The scan just doesn't do it justice.
The Glue Pad and the Composition Leaf certainly worked well together - take my word for it - it looks great!
For this Friday amusment I used: (click on each link to see the product)
Bazzill Blue Monochrom
Dotted Harlequin Border (large diamonds) for the hanging tapestry
Flourishes
Vintage Bare Bottoms Collage image
Brilliance Platinum Planet Stamp Pad
Brilliance Pearlescent Sky Blue Dew Drop
The Essential Glue Pad
Puffy Burgundy Heart
Silver Composition Leaf
Happy weekend creating!
Wednesday, January 9, 2008
Tuesday Created byhand Frames Challenge

This was not what I expected to do at all, but there was that stamp of the girl with the hat (Stampinton) staring across the room at me. She need a heart and I needed a frame! The background doesn't show up at all, I'm afraid. The background was stamped with Flourishes using Resist ink then spritzed with Color Wash. Not the usual effect and totally lost in the scan... so sad....
Products used in this piece:
Create without Limits!
Subscribe to:
Posts (Atom)